Q: How do I import cyberface XXXX into the game using Greg's tool?
A: Chances are, the cyberface you downloaded is in .iff format. Firstly, locate the default cyberface archive in Greg's tool. Generally, for a team, they're in lineup order, so the starting PG would be the first cyberface, then SG, SF, ect. Once you located the archive that contains the cyberface, right click and select "import iff archive" from the drop-down.
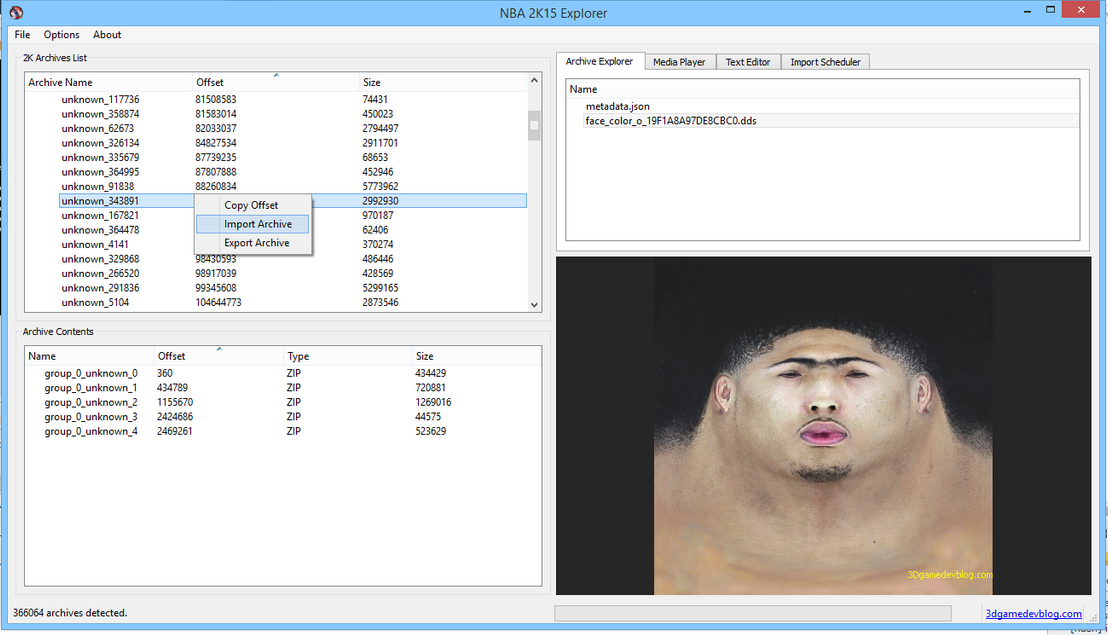
When you select the .iff from your PC, it should show up in the import scheduler. Double check that it has.

If it's there, to to File > Apply Changes, and give the program will begin importing the iff.
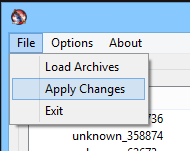
The cyberface should now be imported!
Q: I'm importing a texture. What do all these these texture options mean?

A: Well I'm glad you asked, you handsome devil.
For DDS images, only the swizzle option is applied, so choosing texture types and mipmap amounts here will do nothing, so make sure the DDS you're importing is the right format. For the most part, leave swizzling checked, unless the specific texture you're trying to import doesn't work when swizzling.
PNG and JPG images on the other hand do work with the texture format and import features. Again, for the most part, leave swizzling checked.
It's also worth noting that if a default image has an alpha channel, it'll be best to import a DDS so you can have a proper alpha channel, something PNG and certainly JPEG lack.
Q: But Mr. TBM, how do I know which texture options to pick?? Stop being so lazy like the 2K developers!
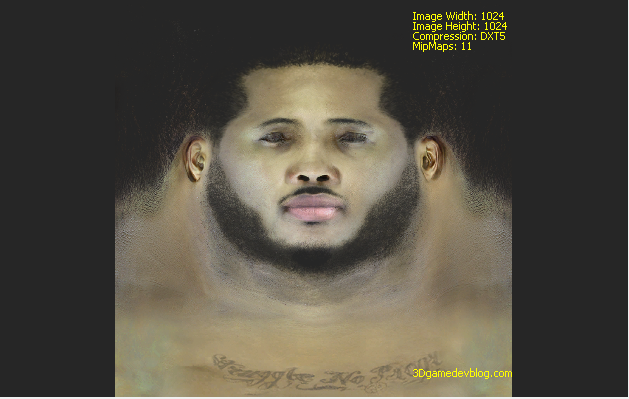
Calm down, man. It's simple. Just click the image viewport and press the I key, and the information for the image will pop up in the right-hand corner. When you replace the default image with a PNG or JPG, use these settings, and likewise, for DDS, export in Photoshop or GIMP with these settings.
Q: How Do we make green texture for cyberfaces now? They're different than in years past.
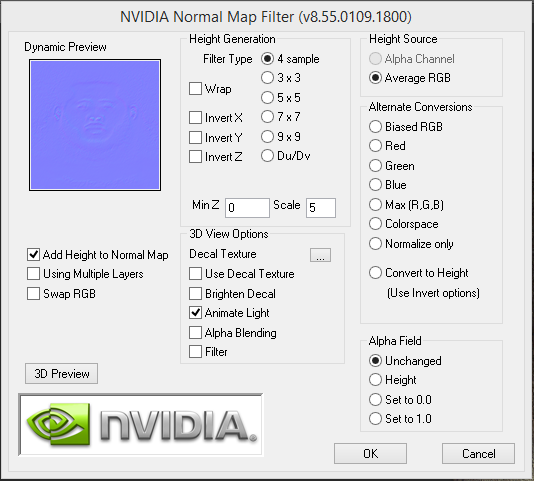
A: They're called normals now. Open your cyberface in Photoshop or GIMP, delete the alpha channel, and open Nvidia's normal map filter.
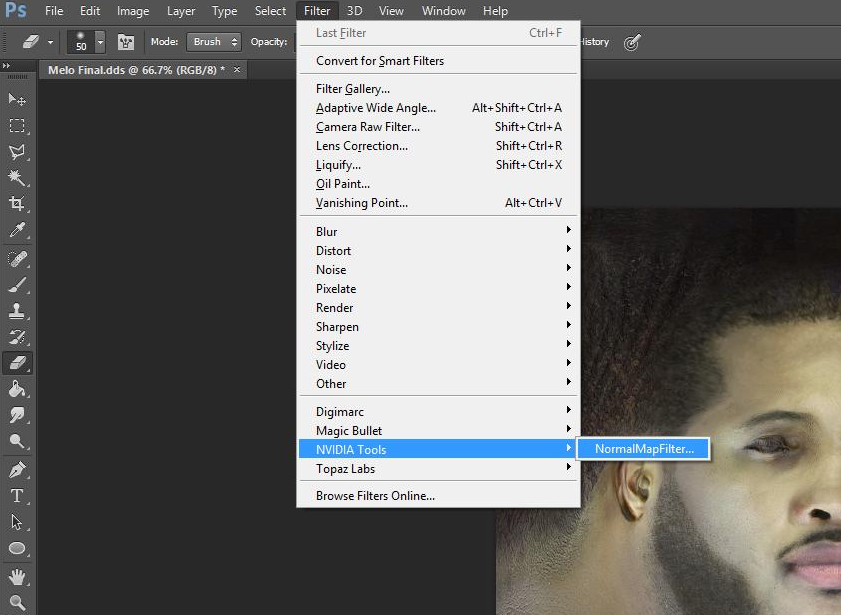
These are the settings I've been using. If you find better results with other settings, feel free to use those.
This is a sample result:
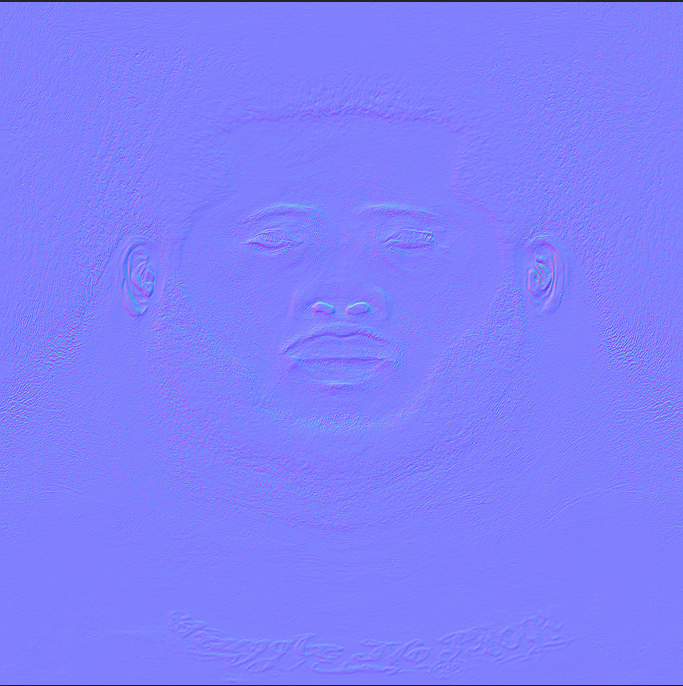
For some, you might need to manually touch the normal up, like in this image, because it's adding a bump to the tattoos, which we probably don't want.
Then, export the file as a DDS with the texture type as 3Dc.
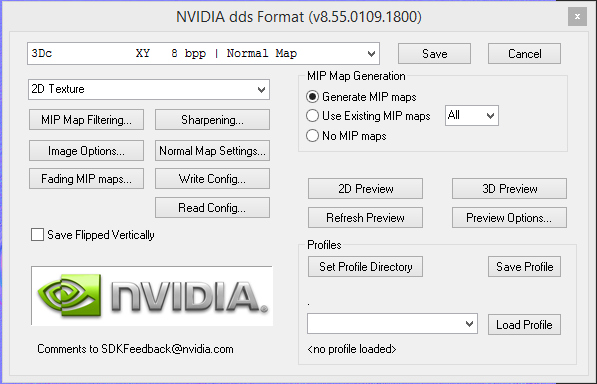
Finally, import it over face_detailnormal (AKA group_0_unknown_2)
Q: For team archives, what's the file order?
A: Generally speaking, it's in this order:
1. Stadium files
2. Floor Files
3. Player files (models, cyberfaces, portraits, big heads, full-body images)
4. Jerseys
5. Coach files (same as player files)
6. Crowd clothing
7. Logos
That should cover it. Any questions? Leave them here.